Tuesday, November 22, 2022

Dig Deeper

JJ Sobey

Introduction to Anthropology

381-100-AB sec 0002

Dig Deeper - Further Readings on L’Anse aux Meadows


Dearing, R. (2015) Vikings in Newfoundland and Labrador. [Audio podcast episode]. In Cross Talk (Newfoundland edition). https://www.cbc.ca/player/play/2686887619

Handwerk, Brian. (2021). New Dating Method Shows Vikings Occupied Newfoundland in 1021 C.E. In Smithsonian Magazine. https://www.smithsonianmag.com/science-nature/new-dating-method-shows-vikings-occupied-newfoundland-in-1021-ce-180978903/z

L'Anse aux Meadows national historic site. (n.d.). Newfoundland and Labrador Tourism. https://www.newfoundlandlabrador.com/top-destinations/lanse-aux-meadows

L'Anse aux Meadows national historic site. (2022, February 9). Parks Canada. https://www.pc.gc.ca/en/lhn-nhs/nl/meadows

L'Anse aux Meadows national historic site. (n.d.). Unesco. https://whc.unesco.org/en/list/4/

Pettigrew, W. (Producer & Director). (1984). The Vinland Mystery [Video file]. Canada: National Film Board. Retrieved November 20, 2022, from https://www.youtube.com/watch?v=VYFNcww6-2c&ab_channel=NFB

Terry, P. (Host). (2018, January 6). L'Anse Aux Meadows (No. 18006). [Audio podcast episode]. In Arch 365 - 365 Days of Archeology. https://www.archaeologypodcastnetwork.com/arch365/18006

Tree-ring study dates Canada’s Viking settlement. (2021, October 21). In Archeology. https://www.archaeology.org/news/10094-211021-ewfoundland-norse-vinland

Weiss, D. (2022). When the Vikings Crossed the Atlantic. In Archeology. https://www.archaeology.org/issues/451-2201/features/10191-newfoundland-viking-settlement-dating


Saturday, June 7, 2014

"One More Kiss" - a wedding scrapbook page for "Scrap Yourself" challenge blog


O HAI!   Guess who's a new part of a great challenge blog?    Yup - I've joined the team over at "Challenge YOUrself", a challenge blog devoted to getting YOU on your pages.  This month's challenge is to create a layout about YOU AND THE MALE(S) in your life.  This could be your father, grandfather, husband, son, a furry family pet.  I chose my Prince.   

When you're done here, please hop on over and see what the rest of the team has created!


I love to cluster embellishments.  Chipboard shapes can be a great 'ground' for a cluster, helping to keep embellishments from looking like they are just 'floating' on the page:


I revisited an old favorite technique of tucking flowers under the edge of papers:


Customizing chipboard can be a lot of fun.  These were embossed using acrylic paint, and metallic embossing powder.  I used an uneven coverage to get an aged look


Lace was tucked in on the page, in a few places, too:


Thanks for visiting!  And don't forget to check out "Scrap YOUrself" - we'd love to see your take on the challenge!

Supplies:
PP - Webster's Pages, Prima, 7gypsies
chipboard - Dusty Attic
flowers - Prima
cameo - Webster's Pages
letters - Webster's Pages
pearls - Basic Grey, Kaisercraft
stick pins - Maya Road
lace - Webster's Pages, Love My Tapes, unknown
paint - Ranger Distress
embossing powder - Wmt
ink - Ranger Distress Stain

Friday, May 9, 2014

Montreal Color Run


So, yeah... ^^^ this happened.  And it was fun - lots of colourful fun.  And I got to use colourful papers and embellishments to scrapbook it!   I have a crush on Lucky7Factory papers.


You know what's perfect for making fimo embellishments stay put?  Helmar 450.  Still my favorite go-to for hard to stick items.


Stash-busting tip - pink Magic Mesh and Doodlebug jewels match this collection perfectly!


Check your cut-off strips before you toss them - the ones on this collection will all get used.


Supplies:
PP - Lucky7Factory (Technologie collection)
letters - Rose Moka
wood -  Studio Calico
jewels - DoodleBug
fimo embellishments - Kimmieprout
ink - Distress Stain by Ranger
marker - Faber-Castell PITT pen
other - Magic Mesh

Monday, March 24, 2014

"Run for the Cure" - mixed media scrapbook page featuring Susan K Weckesser products


Hi there!   I created this layout for my guest spot with Susan K Weckesser this month.  This month's theme is mixed-media - which I like including on my scrapbook pages, so it was a good match for me.  :)

After covering my background with gesso, I added border strips with Susan's stencil and some texture paste:


I added a little colour to the background with Inktense blocks and blended with gesso.  Then I added some stamping, including the banner from "Create Your Day", and some texture stamping with a stamp from the ABC.123.Washi set. 


I wanted a little more bright colour, so I spritzed some Dylusions spray through a Want 2 Scrap stencil.


You can also spot stamps from In-Circle-Me, and Insta-Cute in these detail shots.


Thank you for visiting!


Susan K Weckesser supplies:
Live in Color paper collection
borders stencil by The Crafters Workshop
ABC.123.Washi , Create Your Day, In-Circle-Me, and Insta-Cute stamp sets by Unity

Other supplies
Arrows stencil and pearls by Want 2 Scrap
Dylusions sprays
letters - American Crafts, Basic Grey
washi tape - Hambly
cork geotag - Studio Calico
flower - Prima
flair - Evalicious
ink - StazOn, Distress Stain
Inktense blocks - Derwent
texture medium - Liquitex
gesso -  DeSerres
marker - Faber-Castell
die - Memory Box

Friday, March 14, 2014

"Dreaming of Spring" - mixed media on canvas

Hello friends - long time no see! This month I returned for a visit on the Susan K Weckesser blog.   I was delighted to find that this month's theme was mixed media, as I love playing with different products and seeing how they work together.


My project started out as just a piece of raw canvas, to which I added stamps from the "At Ground Level" set.   Then I stitched over many of the lines with my sewing machine:


I added clouds from the "Create Your Day" stamp set, and some colour using Inktense pencils & water.  I also stamped some background texture using a stamp from the "Abc-123-Washi" set, and the "In Circle Me" stamp.


I decided the colours didn't 'pop' as much as I would like, so I added india inks, and a little more Inktense (but using the blocks this time):


The final steps were adding a few touches of colour with Smooch inks:


and a bit more sewing (and fraying the edges):


Here's a close-up of some of the stitching:


And the final project, again.   I was originally planning to put this on a card, but my daughter has laid claim to it, and it will be mounted in a shadowbox for her bedroom, instead.  :)


Thanks for visiting!

Susan K Weckesser Supplies:
Stamps by Unity - At Ground LevelAbc-123-Washi, Create Your Day, In Circle Me

Other supplies:
Colorsnap Smooch inks
Derwent Inktense pencils & block
Dr Ph Martins India Inks
Ranger Archival Ink
unbleached raw canvas, sewing machine thread

Saturday, March 8, 2014

Not Dead Yet

OHAI!

Nope - not dead.


Took a hiatus.

It was needed.


Welcome back.

Monday, September 23, 2013

Susan K Weckesser Inc Design Team Back 2 School Blog Hop


 Welcome to the 2013 Susan K Weckesser Inc Design Team Back 2 School Blog Hop.  Our Design Team and Guest Designers have created a week’s worth of great projects to bring you inspiration and fun - all themed around Back 2 School. We encourage you to visit each member’s blog, leave a comment and maybe find a new blog to follow. After you have visited all participating team member’s blogs, go back to THE STARTING POST at Susan K Weckesser’s My Sweet Earth Blog and leave a comment letting us know which project either inspired you or touched your heart. Don’t worry, you have all week to take your time and go through the blogs. We’ll feature a few each day at Susan K Weckesser Inc, but will draw names from comments left on THE STARTING POST for our grand prize.

And now to share my project.  :)


Susan's whimsical papers have some designs that just beg to be 'fussy-cut', so who am I to say no?


This chipboard window (Want2Scrap) was primed with gesso, then coloured with Chalkboard mist.


I used Dylusions sprays with the Want2Scrap stencil to add a little colour to my cardstock.


A few wooden embellishments finish it off. 


papers - Susan K Weckesser
stencil, chipboard - Want2Scrap

Thanks for visiting!

Here is the list for ALL team members, but again don’t panic, we will highlight a few each day so you can come back and visit a few at a time if you want because we know how busy you Moms – and Dads – are! You have until Saturday night 11:55 PM CST to leave a comment at Susan K Weckesser’s My Sweet Earth.

Susan K Weckesser
Rita Barakat – Design Team Member
Lynne Mizera – Design Team Member
Jeanie Dickinson – Guest Designer
Tracy Easson – Design Team Member
Tatiana Allen  - Guest Designer
Einat Kessler – Design Team Member
Jaine Drake – Guest Designer
Julie Short – Design Team Member
JJ Sobey - Design Team Member
Allie Gower – Guest Designer
Keri Sallee – Guest Designer

Friday, March 15, 2013

"Take my picture?" - scrapbooking with Pink Paislee and Helmar

Takemypicture-jjsobey-helmar

Hello there!  All this week, Helmar has been partnering with Pink Paislee.  I got to work with the "Portfolio" collection, and I loved it!

The "Portfolio" collection is hip & trendy and it's perfect for 'everyday' pictures.  The 'polaroid' frames are fun, and easy to work with - a little Professional Acid Free glue, and you're good to go.
There are lots of fun die-cut shapes in this collection.  I layered a few with Zap Dots to make 3D embellishments:

Takemypicture-jjsobey-helmar-detail

Naturally, I glued all the papers, and die-cut tags with Professional Acid Free glue, and 450 Quick Dry works a treat with wood embellishments.

Takemypicture-jjsobey-helmar-detail3

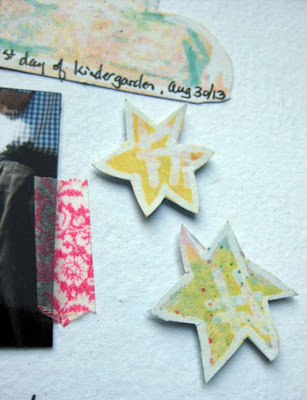
For tiny little embellishments like these wooden stars, I like to grab them with tweezers and dip the back into 450 Quick Dry.  It's easier than trying to apply the bottle tip to the embellishment.

Takemypicture-jjsobey-helmar-detail4

Helmar products:
Partner products:
Other supplies:
ink - Ranger Distree
wood pieces - Studio Calico
marker - Faber-Castell PITT pen

Wednesday, March 13, 2013

Easter is coming - Scrapbook 'boy' page, with Authentique


Well, HELLO THERE!  Remember me?  Sorry about the bloggin hiatus - it was necessary.  I'm glad you're still here. :)

I want to share an Easter layout featuring Authentique's "Hope" collection. One of the things I love about this Easter collection is that is it very well suited to 'boy' pages - something that you don't often find in Easter papers.

I fussy cut some egg motifs from one of the papers (and die cut some spring branches) to add as embellishments.  A little foam adhesive (Helmar Zap Dots) makes the eggs stand out.


I folded some May Arts ribbon and tucked it under the edges of some of the paper layers for a little added texture.  Even though the arrow sticker is self-adhesive, I added some foam dots to the back to make it 'pop' - which is a great way to make a simple sticker standout from the background.


These kraft flag pins from Maya Road are the perfect color as-is for this collection.


I've used this trick before (and I'll use it again) because it's so effective with multi-patterned layouts:  I placed my title stickers on a neutral piece of the patterned paper, cut around the whole title, then adhered with foam dots.  This makes it stand out a bit, and makes it easier to read.


Supplies:
PP, stickers, letters - Authentique "Hope" collection
Maya Road flag pins  
May Arts ribbon
Helmar 450 Quick Dry, Helmar Professional Acid Free glue, Helmar Zap Dots 
wood bird - Prima 

Friday, February 8, 2013

'Tiles' on Cards with Helmar and Clearsnap

Bazzill-helmar-card

Hi Everyone!   Today I wanted to share with you a couple of cards I made using ColorBox Molding Mats by Clearsnap.  (The first card is based on Helmar's February Sketch Challenge) 

To create the 'broken tile' on this card, I started with Crayola Model Magic.  Yup - the same stuff your kids play with!


Crayola clay tile
I rolled it out with a brayer first.  Then I inked up the Molding Mats with ColorBox Chalk ink to act as a mold-release, and smooshed it into the clay.  Peel back carefully!
Crayola clay tile-1
I trimmed the clay to the shape I wanted, and let it dry.  Then I highlighted the 'tile' with more Colorbox chalk ink.

Now - this clay has a funny texture, so I didn't take any chances - I used Helmar 450 Quick Dry to make sure it stayed put.  (The papers were all adhered with Professional Acid Free Glue)

Bazzill-helmar-card-detail
The tiles on this card were made in the same way. 

Skw-helmar-squares
I added Zap Dots behind the first layer of paper, to give it a little extra lift:

Skw-helmar-squares-detail
I can see me using these Molding Mats again - they were a lot of fun to experiment with, and it would make a fun project with my kids.  Of course, Helmar will be there to hold together our experiments!
Helmar products:
Preferred Partner Products: